APARTMENT
Kitchen
Spending time in the kitchen will greatly help prepare the students for the real world and living alone. They can cook for themselves as well as work at a restaurant. But first, they need kitchen safety!
- Roll up long sleeves, tie back long hair and remove loose clothing that could cause a fire hazard
- Wash your hands with soap
- Clean your area and if something gets messy clean it up
- Always use oven mitts to handle food on the stove, in the oven or microwave and under the broiler.
- When working with pots on the stove, be sure to hold the handle so you don't burn yourself
- Always pick up knives by their handle and do not point them at anyone.
- Keep electrical cords away from water
- Before leaving the kitchen, check that the oven and burners are all turned off.
- If you burn yourself, tell someone!
- Don't put knives or other sharp objects in a sink full of water. Someone could reach in and get hurt.
- Never put water on a cooking fire - it could make the fire bigger. Use a fire blanket or baking soda or flour to put the fire out.
- Don't reuse anything that touched raw meat or vegetables. Wash it first!
- Keep paper towels, dish towels and pot holders away from the stove top so they don't catch on fire.
Bathroom
With the bathroom, students can learn about personal hygiene and how to prepare for the beginning of the day.
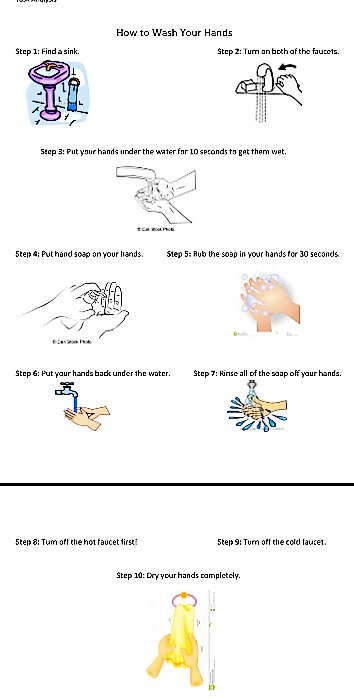
This could include - brushing teeth - brushing hair - washing hands - setting the shower to the right temperature. They could also learn how to clean a bathroom. They can learn how to clean and unclog toilets. Students can practice cleaning the toilet, throwing out a toilet paper roll, and putting a new toilet paper role in the toilet paper holder. In the bathroom, there could be task analysis posters that could help assist the students in remembering what to do. For example: this is a task analysis poster that could be used for washing hands |

|
Laundry Room


|
The supplies we would need to complete this project would be a stacked washer and dryer, laundry baskets, detergent, dryer sheets, iron, and an ironing board.
The students would learn several life skills in the laundry room. It would allow them to practice:
They would be required to take on tasks such as separating the clothes by color, washing and folding the clothes, as well as ironing. The work the students will be doing in the laundry room will provide the students practice with tasks that are necessary in the future. |
MICRO-BUSINESS
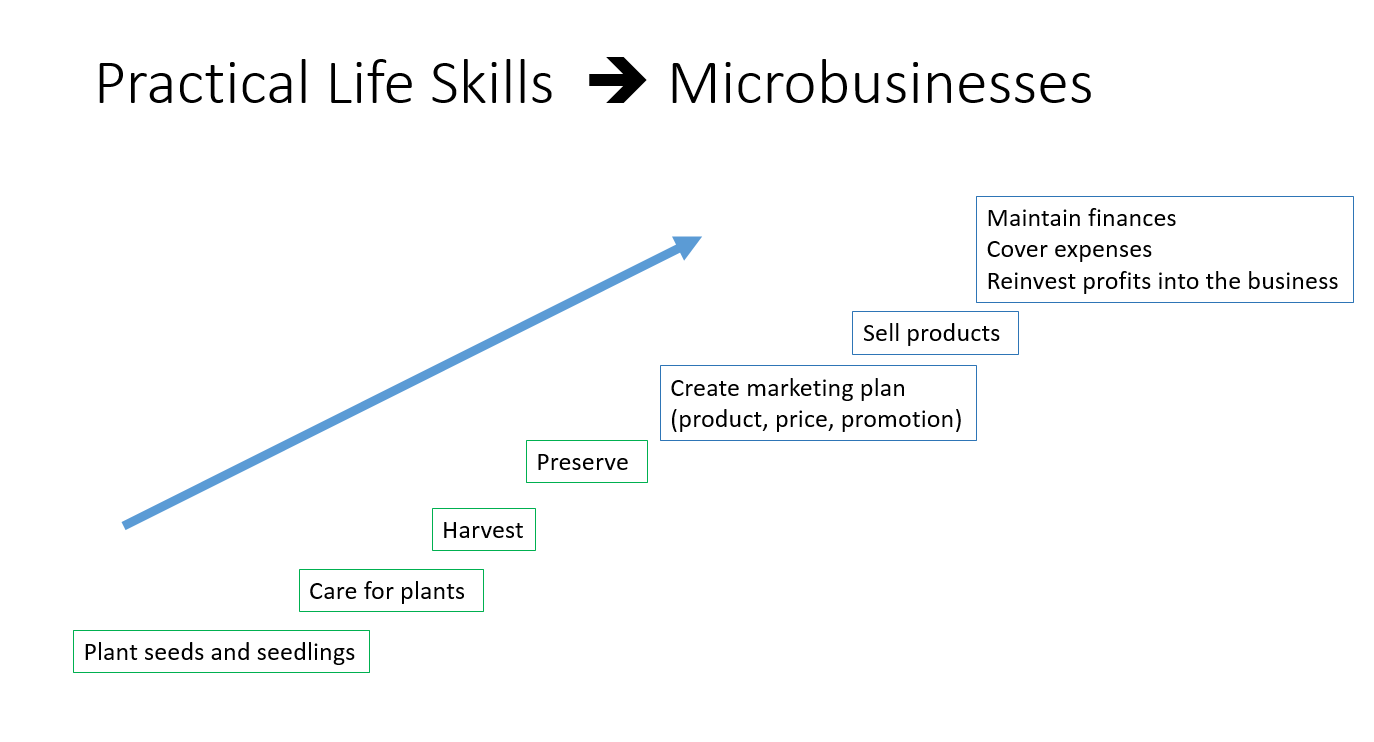
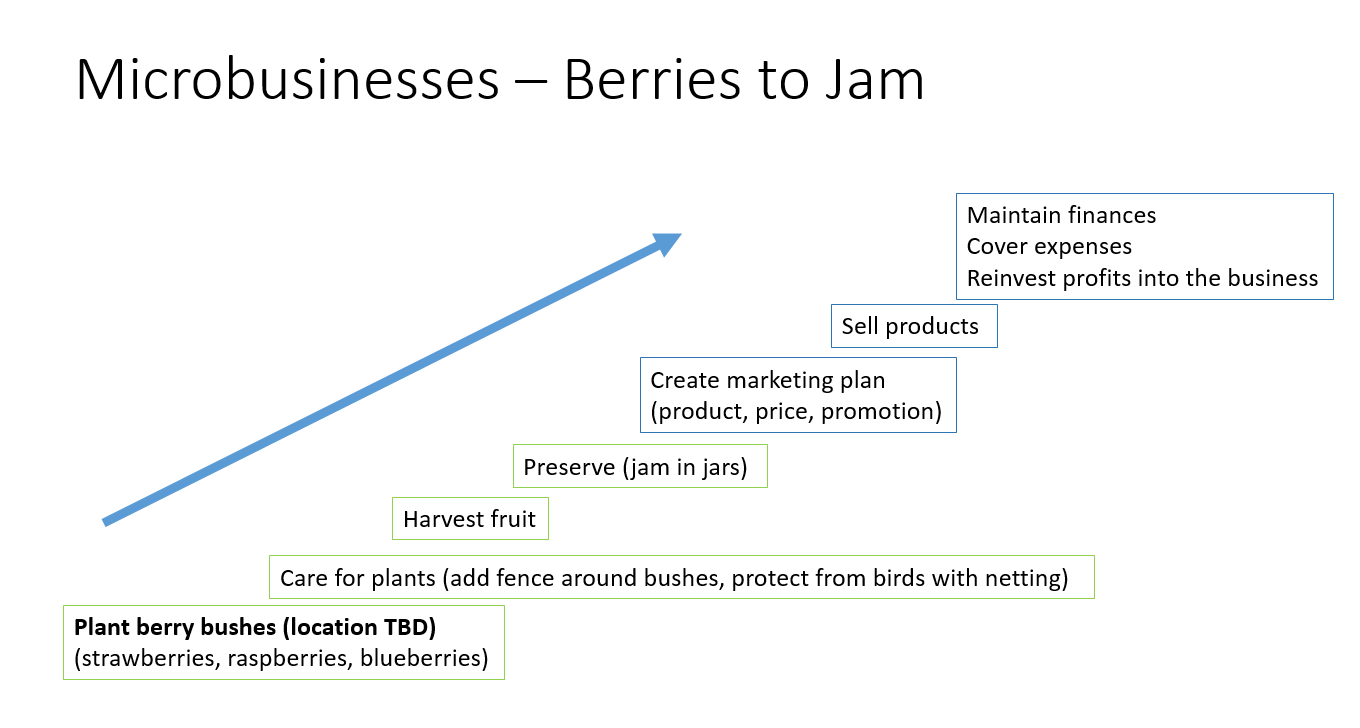
Having students follow steps and run their own business is great practice for the real world after CTC. The growing and harvesting teaches the students about gardening and care of another life. Then they can package it and prepare it. Lastly, they get to deal with money. Many of the necessary skills for math as well as social skills include money exchange and different forms of payment.

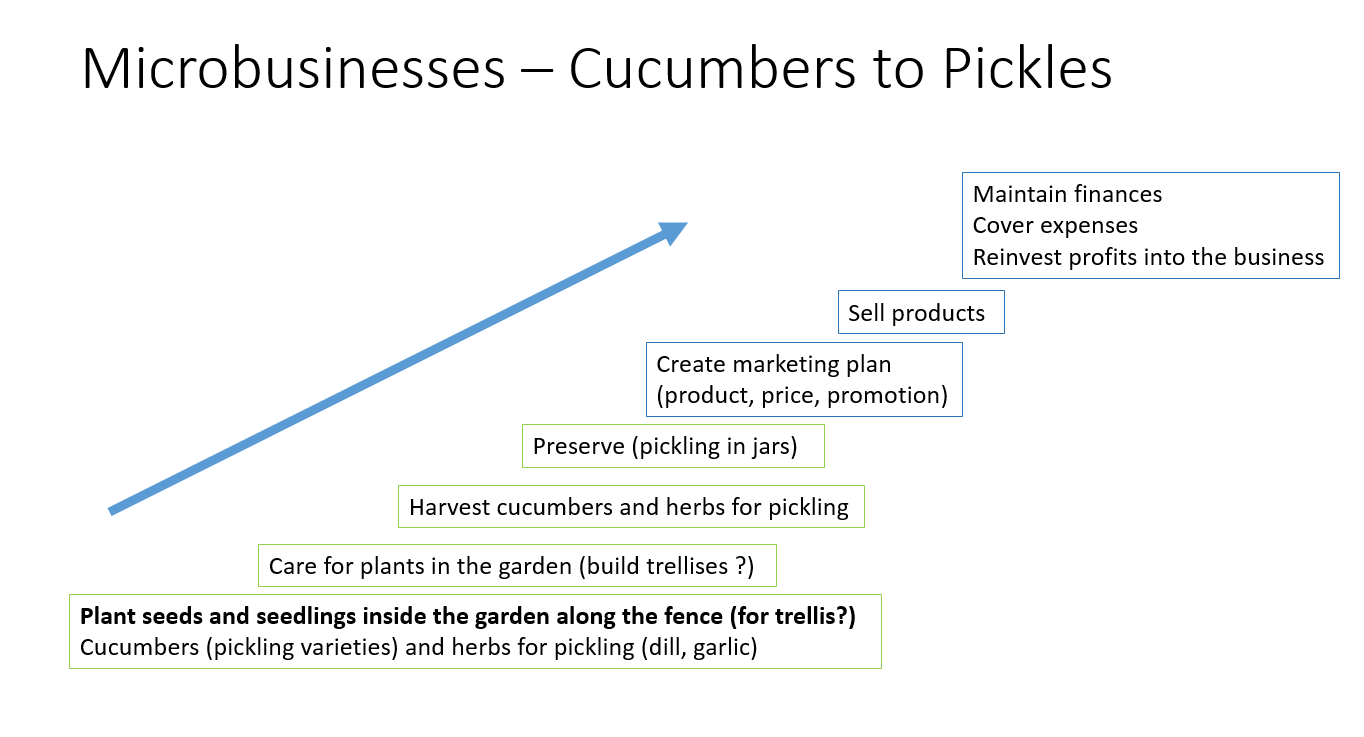
Our idea for this microbusiness is to plant grow cucumbers in the school's garden. After the cucumbers are harvested, the students can pickle them and then sell them at the school store. This will bring many great learning opportunities for the students including growing cucumbers, pickling cucumbers, and selling foods. These are great life skills for the students to have.
Planting:
The right type of cucumbers must be planted for the pickling process. These types include Bush Pickle Cucumbers, Carolina Cucumbers, and Kirby Cucumbers. Bush Pickle Cucumbers are a good size for containers while Carolina Cucumbers are medium sized and a little too big for containers. Some cucumber plants are bushes while others are vines. After choosing the right cucumber seeds, the seeds can be planted in the garden. They must be planted in warmer weather and should be planted in soil temperatures that are in the 70-degree range. It is important to care for the cucumber plants the correct way after they are planted. They must be watered frequently and the soil must always be moist, especially when the fruits start to form. In the spring time, the seeds must be covered by a black plastic or polyester row covers. These can prevent the infestation of cucumber beetles.
Harvesting:
When harvesting cucumbers be sure to use sharp garden shears or pruners. If they are removed with a sharp tool, the vine or plant will not be injured or harmed. Do not twist or pull the fruit off of the plant. The stem should be cut about 1/4 inch above the fruit. Many cucumbers are very sensitive to bruising so be careful when handling the fruit. Harvesting should be done when the cucumbers seem hard to the touch and are a good size to eat. If they are not harvested in time they will become too ripe and may become squishy. After harvesting, the pickling process may begin.
Pickling:
Selling:
If the cucumbers are going to be sold, be sure to place them in nice, clean jars. Each jar should also have the same amount of cucumbers. The should be separated by how pickled they are. Some people enjoy cucumbers that are more pickled than others. Make sure to mark which jars are which. Come up with a good selling price for the pickles once they have finished the pickling process. Pickles and regular cucumbers can be sold in the school store.
Planting:
The right type of cucumbers must be planted for the pickling process. These types include Bush Pickle Cucumbers, Carolina Cucumbers, and Kirby Cucumbers. Bush Pickle Cucumbers are a good size for containers while Carolina Cucumbers are medium sized and a little too big for containers. Some cucumber plants are bushes while others are vines. After choosing the right cucumber seeds, the seeds can be planted in the garden. They must be planted in warmer weather and should be planted in soil temperatures that are in the 70-degree range. It is important to care for the cucumber plants the correct way after they are planted. They must be watered frequently and the soil must always be moist, especially when the fruits start to form. In the spring time, the seeds must be covered by a black plastic or polyester row covers. These can prevent the infestation of cucumber beetles.
Harvesting:
When harvesting cucumbers be sure to use sharp garden shears or pruners. If they are removed with a sharp tool, the vine or plant will not be injured or harmed. Do not twist or pull the fruit off of the plant. The stem should be cut about 1/4 inch above the fruit. Many cucumbers are very sensitive to bruising so be careful when handling the fruit. Harvesting should be done when the cucumbers seem hard to the touch and are a good size to eat. If they are not harvested in time they will become too ripe and may become squishy. After harvesting, the pickling process may begin.
Pickling:
- Pack freshly harvested pickles into jars
- The pickles should not stand more than 1/2 inch below the top of the jar. If they are too tall, they can be trimmed.
- Combine vinegar, water, and salt in a small sauce pan over high heat
- Mix the brine until boiling
- Turn off heat and let cool
- Pour cool brine into the jars of cucumbers
- Close the jars and let them sit
- Depending on how much flavor you would like in your pickles the cucumbers can be left for different periods of time
- The more flavor you would like, the longer the cucumbers should be pickling
- When the pickling process is finished, the pickles are ready for selling.
Selling:
If the cucumbers are going to be sold, be sure to place them in nice, clean jars. Each jar should also have the same amount of cucumbers. The should be separated by how pickled they are. Some people enjoy cucumbers that are more pickled than others. Make sure to mark which jars are which. Come up with a good selling price for the pickles once they have finished the pickling process. Pickles and regular cucumbers can be sold in the school store.

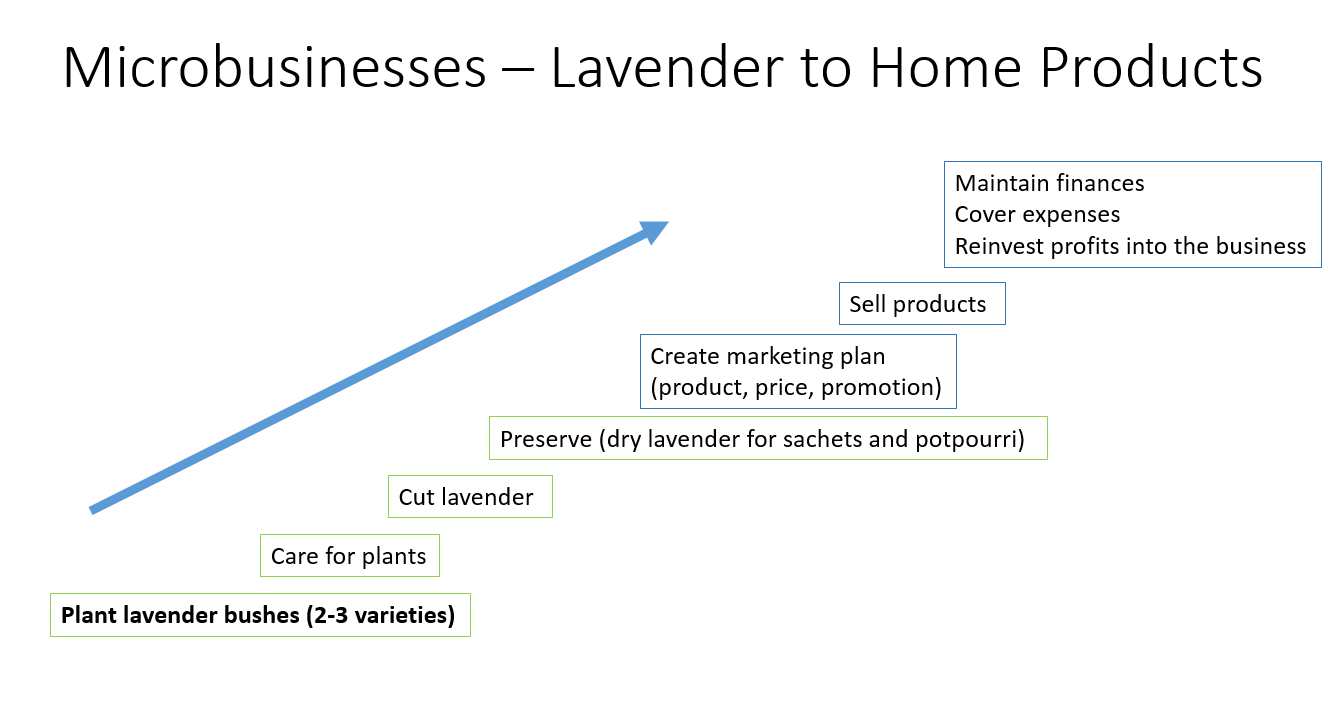
Our idea is to plant the lavender around the border of the garden, but inside the fence because there is a great deal of wildlife in Denville. This will create a beautiful border as well as a nice smell.
There is a variety of lavender bushes that can be planted. Mad Lavender Farm, a large and successful lavender garden in NJ, found that French Fields and Buena Vista grow well for culinary flavor and Hidcote and Gross Bleu for its scent.
Planting: (Avoid December and January and July and August
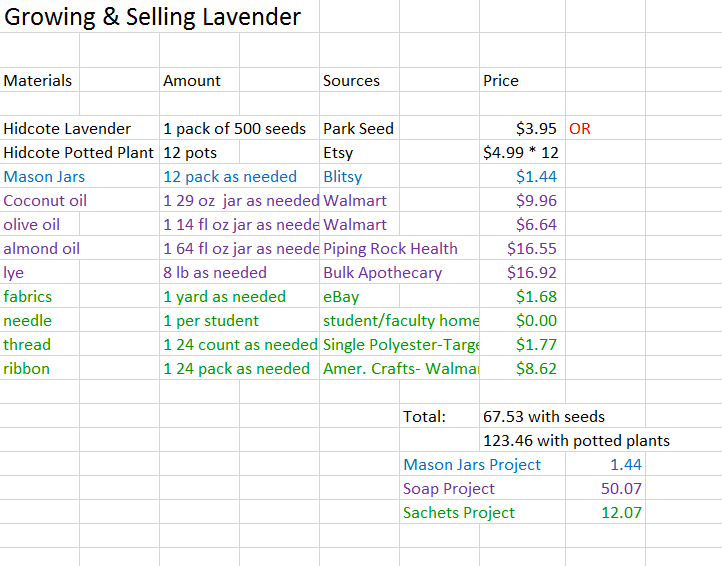
** The school can choose to plant seeds if they want to wait a year for growth, or plant potted lavender. Prices of both are listed below**
1) Use well-drained soils with low fertility
2) pH of soil should be 6.5 or higher
3) Create an 18″ – 24″ mound with the soil described above.
4) Add 2 shovelfuls of 1″ round stone -- this allows the soil to drain
5) Dig a hole for the plant
6) Place your plants 5-6 feet away from each other for good air circulation
7) Water deeply every 7 days for the first 2 years
Prune:
1) Thin the lavender to about 8 small groups
2) Cut off dead flowers
Harvest:
1) Gather the lavender in a bunch
2) Cut the lavender above the woody stalk
Drying the lavender:
1) Hang the lavender upside down in bundles in a dark, cool place
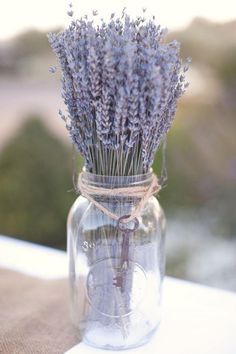
Make use of your lavender and make some profit!
1) Mason jars with dried lavender for scent and decor
There is a variety of lavender bushes that can be planted. Mad Lavender Farm, a large and successful lavender garden in NJ, found that French Fields and Buena Vista grow well for culinary flavor and Hidcote and Gross Bleu for its scent.
Planting: (Avoid December and January and July and August
** The school can choose to plant seeds if they want to wait a year for growth, or plant potted lavender. Prices of both are listed below**
1) Use well-drained soils with low fertility
2) pH of soil should be 6.5 or higher
3) Create an 18″ – 24″ mound with the soil described above.
4) Add 2 shovelfuls of 1″ round stone -- this allows the soil to drain
5) Dig a hole for the plant
6) Place your plants 5-6 feet away from each other for good air circulation
7) Water deeply every 7 days for the first 2 years
Prune:
1) Thin the lavender to about 8 small groups
2) Cut off dead flowers
Harvest:
1) Gather the lavender in a bunch
2) Cut the lavender above the woody stalk
Drying the lavender:
1) Hang the lavender upside down in bundles in a dark, cool place
Make use of your lavender and make some profit!
1) Mason jars with dried lavender for scent and decor
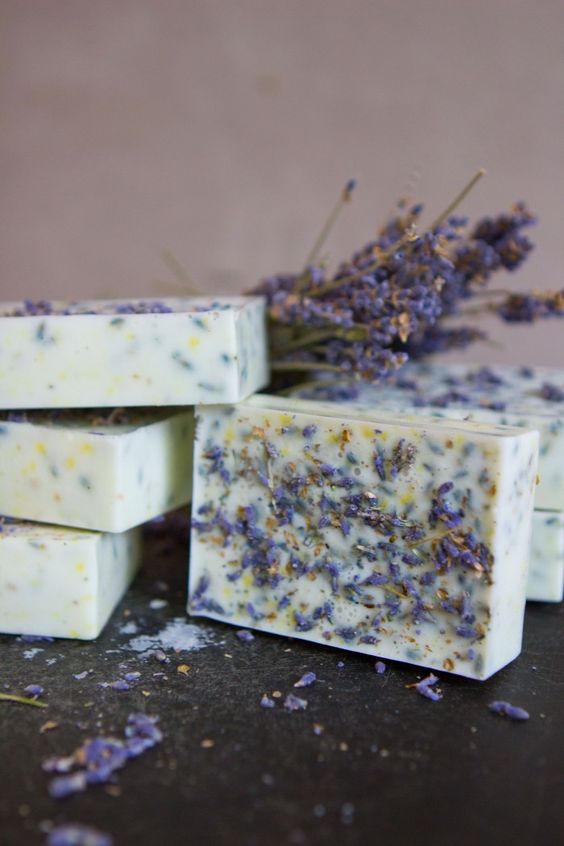
2) Make soap!
- ⅔ cup coconut oil
- ⅔ cup olive oil
- ⅔ cup other liquid oil (almond oil, grapeseed, sunflower or safflower oil)
- ¼ cup lye
- ¾ cup cool distilled water
- Measure your water into the quart canning jar. Measure your lye, making sure you have exactly ¼ cup. Slowly pour the lye into the water, stirring as you go. Stand back while you stir to avoid the fumes. When the water starts to clear, you can allow it to sit while you move to the next step.
- In the pint jar, add your three oils together. Heat in a microwave for about a minute. Check the temperature of your oils – it should be about 120° or so. Your lye should have come down by then to about 120°. Wait for both to cool somewhere between 95° and 105°.
- When both the lye and oils are at the right temperature, pour the oils into a mixing bowl. Slowly add the lye, stirring until it’s all mixed. Stir by hand for a full 5 minutes. After about 5 minutes, you can keep stirring or you can use an immersion blender. The soap mixture will lighten in color and become thick. When it looks like vanilla pudding it’s at “trace” and you’re good to go.
- Add the lavender. Stir thoroughly to combine. Pour the mixture into mold(s) and cover with plastic wrap. Set in an old towel and wrap it up. This will keep the residual heat in and start the saponification process. Saponification is the process of the base ingredients becoming soap.
- After 24 hours, check your soap. If it’s still warm or soft, allow it to sit another 12-24 hours. When it’s cold and firm, turn it out onto a piece of parchment paper or baking rack. If using a loaf pan as your mold, cut into bars at this point. Allow soap to cure for 4 weeks or so. Be sure to turn it over once a week to expose all the sides to air (which is not necessary if using a baking rack). For a DIY soap drying rack, I took an old potato chip rack and slid cardboard fabric bolts (from a fabric store) through the rungs.
- When your soap is fully cured, wrap it in wax paper or keep it in an airtight container. Hand made soap creates its own glycerin, which is a humectant, pulling moisture from the air. It should be wrapped to keep it from attracting dust and debris with the moisture.
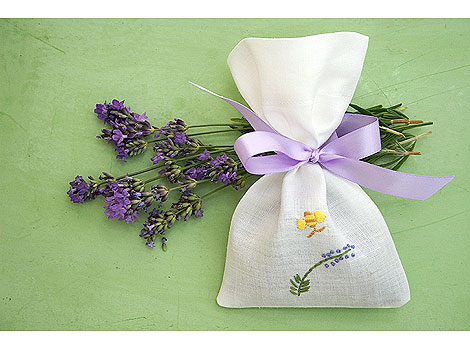
3) Make lavender sachets
- Pick sachet fabric
- Cut 2 equal rectangular pieces
- Line up the 2 pieces
- Sew the pieces leaving an extra 1/4 in. border for the seam
- Leave the middle of the top unsewn for stuffing
- Add your dried lavender inside
- Take a ribbon to close the sachet

Planting, Growing, and Harvesting Strawberries:
Strawberry plants come in three types: ‘Northeaster’ is best suited for the northeastern US and southeastern Canada. Fruit has strong flavor and aroma.
Care
Harvest/Storage
Blueberries:
Planting
Care
Harvesting
Strawberry plants come in three types: ‘Northeaster’ is best suited for the northeastern US and southeastern Canada. Fruit has strong flavor and aroma.
- Day-Neutral: Insensitive to day length, these varieties produce buds, fruits and runners continuously if temperature remains between 35 and 85. Production is less than that of June bearers.
- Everbearer: These varieties form buds during the long days of summer and the short days of autumn. The summer-formed buds flower and fruit in autumn, and the autumn-formed buds fruit the following spring.
- June bearer: Length-of-day sensitive, these varieties produce buds in the autumn, flowers and fruits the following spring, and runners during the long days of summer.
- Plan to plant as soon as the ground can be worked in the Spring.
- Make planting holes deep and wide enough for the entire root system without bending it. The crown should be right at the soil surface.
- Have plants be about 20in apart, leaving 4 feet between rows.
- Plant in a place that will give 6-10 hours of direct sunlight a day.
- Site must be well-drained. Raised beds are a good option.
Care
- In the first year, pick off blossoms to discourage plants from fruiting.
- Water adequately, about an inch a week.
- Keep the beds mulched.
- Weed by hand, especially in the first months after planting.
- When the growing season is over, mow or cut foliage down to one inch and mulch plants about 4 inches deep with straw, pine needles or other organic material. This can be done after the first couple of frosts, or when air temps reach 20 F.
Harvest/Storage
- Fruit is ready for harvesting 4–6 weeks after blossoming.
- Harvest only fully red (ripe) berries, and pick every three days.
- Cut by the stem; do not pull the berry.
- Harvest will last up to 3 weeks. You should have an abundance of berries, depending on the variety.
- Store unwashed berries in the refrigerator for 3–5 days.
- Strawberries can be frozen whole for about 2 months.
Blueberries:
Planting
- Space the plants in increments that will accommodate the size of the mature plant.
- Dig a hole that is twice as wide and deep as the diameter of the root system.
- You should be able to see a soil line around the stem which will indicate how deep it was.
- Spread the roots and position each plant so that all the roots will be covered with soil.
- Take any peat moss that is packaged with the plant and mix it into the planting hole.
- Pack the soil firmly around the roots and water thoroughly.
Care
- Plants should be watered weekly during the first year, unless they receive plenty of rain.
- Wait four to six weeks after planting before adding any fertilizer. Do not apply fertilizer in late summer or fall. This could stimulate new succulent growth that could become injured during winter.
- Use a balanced fertilizer, such as All-Purpose Fertilizer. This slow-release fertilizer contains sulfate of potash (potassium sulfate), which is good for blueberries. Do not use fertilizer that contains potassium chloride, which can adversely affect blueberries.
Harvesting
- During the first year, it is important that your plants develop a strong root system and produce a lot of new shoots.
- Remove all flowers during the first year and do not allow any berries to develop.
- Do not prune your blueberry plants for two years.
- After two years, prune annually in early spring, before leaves form.
- Remove weak or damaged branches and any branches less than 6″ long.
- Mature, thick branches in the center should be removed to improve air circulation and sun penetration.
- The goal is to have about 12 main stems per plant with a good mix of old and new.
- Any stems more than 2″ in diameter should be removed.
